Saturday, 25 November 2017
Thursday, 8 December 2016

Monday, 5 December 2016
New project - upcycling a 20 year old dress

Too tight and too boring. So I will release some seams and shorten it, Then add embellishment (Chanel's s/s 2009 is my inspiration) and some type of sleeve. Luckily, top of the armhold sits right on the shoulder point. That will make the sleeve easy to fit.

Too tight and too boring. So I will release some seams and shorten it, Then add embellishment (Chanel's s/s 2009 is my inspiration) and some type of sleeve. Luckily, top of the armhold sits right on the shoulder point. That will make the sleeve easy to fit.
Sunday, 23 October 2011
Finished! And things I've Learned
A few days ago I picked up this nice chain from a craft fair in Brisbane. I bought some in black also to compare when I got home. But what's the point in having a chain when it's invisible? There's a lot to think about for just a simple chain, eg 1) what's it made of? You don't want rusty tarnishing junk. 2) How thick would you like the rings? 3) Hmmmm what chain pattern? There are ring style loops, square loops, even loops that have a slight stamped pattern on them. What fabulous fun choosing!

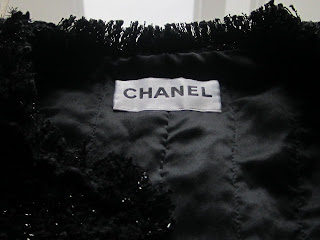
Ages ago I purchased a Chanel product and kept the wrapping ribbon. So I cut off one section and sewed it on with a pick stitch. No, it's not illegal to do because trademark infringement legislation applies to commercially sold goods.
 And the finished product:

This jacket has been an absolute delight to sew and I'm going to make another 2! One with the left over fabric and then with a Linton Tweed. The boucle was a dream to handle and very forgiving. You can sew wonky seams and no one will know what lurks deep beneath that pile! Things I learned:


This jacket has been an absolute delight to sew and I'm going to make another 2! One with the left over fabric and then with a Linton Tweed. The boucle was a dream to handle and very forgiving. You can sew wonky seams and no one will know what lurks deep beneath that pile! Things I learned:
- If you're using a tried and true muslin, forget the 2" seam allowances. It's a waste and nuisance handling, however
- Notwithstanding the above, add slightly more seam allowance where ease is needed eg under armhole and across the shoulders. This is for shrinkage, and yes it did happen to me, but only very slightly. Some sewers think quilting does it, but I suspect in my case the fabric's bulk caused it. So next time I'll add another 2/8" sa onto the standard 5/8" only in areas needing greater ease.
- No more hand sewing the armhole lining together separately. In future I'll treat the sleeve as one piece by sewing the whole thing directly to the bodice, then bind the armhole. (Refer below's technique)
- Finally although it's been fun, next time I'll be doing it "the cheat's way" as shown in Threads magazine issue #128, "Shortcuts to a Designer Jacket". This is where all the seams are sewn by machine first. Then the lining is bagged out. Lastly the quilting is sewn. So stay tuned when this adventure starts in about April 2012. Bye for now.
Tuesday, 11 October 2011
Making & Attaching Trim
Basically the fabric is made from these 3 yarns in different warp & weft repeats:

So I made the trim by cutting a 3"strip of the fabric and slowly stripping the yarns away from both sides until a pleasing width appeared, realising it was to be halved in lengthways to provide a double pile. Then sewed it wrong sides together with a long narrow zig-zag stitch:

Yes, it would have been easier and faster to overlock a strip and slap on a ribbon to hide the overlocking. However this method had 2 advantages: 1) Thicker fringing better disguised the button loops underneath, and 2) It gave a more luxurious look of abundance.

So, this is all there will be for the famous trim. It may not be exciting, but it somehow feels just perfect the way it is. My next attempt (starting about May 2012) one will have a 3-layer purchased trim that will really JUMP out to emphasise those classic Chanel lines.
Monday, 10 October 2011
Finish Lining & add Closures
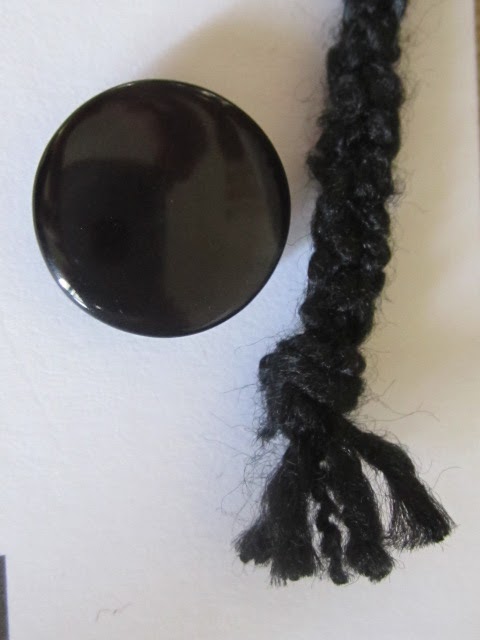
Hand sewing the lining to the fabric was stalled because the closures had to be inserted first and I didn't know what to use. At first, I wanted something glamorous like crystal ball buttons. But on second thought they would have added bubbles of bulk underneath. No good. Better stick to something very flat, which was pretty much boring flat shankless plastic buttons. Their loops were made from pulling six thicker yarns from the fabric and platting them. Here's what will be used:

Good. Now they're attached, I finally could finish the whole lining. Check out the secret tag sewn into the cf!

Good. Now they're attached, I finally could finish the whole lining. Check out the secret tag sewn into the cf!

Tuesday, 6 September 2011
Sleeves Are Set
Thanks to my fitting friend's help, the sleeves are set in. There was too much sa (again) to get an accurate fit. So I trimmed it as much as possible, basted them both in and did a bit of housework to check movement. Very tight fit, but not impossibly restrictive. I was going to insert sleeve heads, but there's simply no room at all.
Left one's perfect! The right one is a bit larger and puffier. Strange, because these things are supposed to be cut identically. Check them out:

 The fabric was very easy to manipulate when easing the sleeve cap. No heat and steaming over a ham needed. It just squashed into position. I'm continually discovering the beauty of loose weave boucle. It's forgiving and compliant in many ways. HOWEVER fell stitching the sleeve lining into place was a headache. How do people do this! You have to match convex and concave curves whilst on the bias all on a slippery fabric. I have butchered the job and am too embarrassed to post a pic of it. OMG never again. Suddenly, binding the armhole seams far more desirable even though it doesn't look anywhere near as nice. Never mind, because it does not detract from the outside. Next job is finishing the neck, cf and hem.
Left one's perfect! The right one is a bit larger and puffier. Strange, because these things are supposed to be cut identically. Check them out:


Subscribe to:
Posts (Atom)