Sunday 27 May 2018

Jacket No. 3 Starts. The inspiration, yarn choice and making the panels.

Finished and very happy with everything.  It turned out bulkier and heaver than I thought it would, but that's not a problem.  I even came to like the black trim.

Can't wait to start on number 4 Jacket sometime mid 2019.  It will be THE prettiest pink jacket.


The finishing touch  - silver chain


This black lurex trim is not the best, but it will do for now.  So just a simple running stitch will secure it.


Now slip stitching to turn under the silk lining begins.  The neckline is a very awkward are because it's on the bias in a tight curve.


 Again as per last jacket, the arm hole will bound with a white satin bias binding.


All quilting finished and the fabric panels have been sewn together.  Zip inserted very easily but some the  yarn fibres and wayward pieces are getting get caught in the teeth.  So I'll have to either trim them or re-weave them back into the fabric.


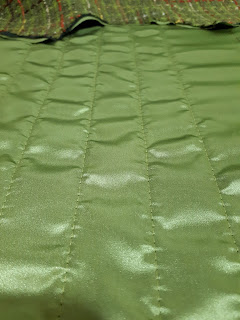
Silk lining tacked to the fabric for stability before machine quilting.


Silk lining layout.


It's never too early to start thinking about the final trim, and black grosgrain looks ok.  Or maybe grey.   


One finished panel.


To make sure that it won't unravel, I four-thread overlocked a  border.  


The finished fabric will unravel badly while handling, so a fusible interfacing is necessary.  It was preshrunk by hovering a steam iron 1" above it.   It fused very well after placing it all on a fluffy towel and being careful to press it as lightly as possible without compromising adhesion.  Then the pattern piece was placed over the stabilised fabric, marked, and cut out.


Everything fits so far.  There is no regular check pattern.  It would be impossible to produce a perfect check, so both warp and weft  yarns are at random placings.


Here's how I chose placement of the weft materials.  By laying the pattern piece over the work periodically.   No bulky yarns over cross seams, eg where sleeve and armhole intersect.   Once removed from the frame, it will shrink slightly all over, so this is accounted for. 


I purchased a weaving loom and set up the warp threads with an assortment of white and grey.


Some of the yarn that I have chosen.


For some time I have been following Chanel's choice of fabric for their jackets.  Here is a collection of theirs and others which have inspired my choice of white, grey and silver with black trim.  However it was impossible to locate a fabric that I liked.  So I will weave my own.


Saturday 24 February 2018

The Trim and Bound Armhole. Finished.


Finished!


For my last jacket I slipstiched the sleeve lining to bodice lining. NEVER AGAIN.  It was a messy job to slip stitch concave to convex, (then the horror of the sleeve cap gathers) with a slippery fabric.  This time I made a strip of bias binding from the silk lining and hand sewed it to the overlocked armhole.  Much neater, less bulk and feels better.


Hand sewing the chain to the hem.


I found these perfectly matching beads at Gemworld, Geebung.  They have an amazing collection.

But I'm not sure how to incorporate them into the trim.


This trim will go around center fronts, neck and sleeve hems.  It's self-fabric strands that are macremè knotted around ribbon that will lay over 1" frayed bias strips.  I ran two parallel rows of straight stitching and pulled them up.  It didn't result in a gather, but a more condensed and fuller strip.   I used a the wide prongs of a teasing comb to fray the sides.

Sunday 4 February 2018

Zip in, Slipstitching Lining


Slipstitching the lining right around

Basting the zip in


Monday 22 January 2018

Sewing the Seams


The final cut with lining, pattern piece and fabric secured together.


Matching the checks was only possible at certain sections of some seams.  


I experimented with pad stitching in small shoulder pad-like pieces of buckram at the shoulders to give light support.

No one wants flat boucle, so wrap and pin a face washer to a sleeve roll.  Use a light touch and finger pressing.


Sunday 14 January 2018

The Muslin, the Cutting and the Quilting

FOUR muslins later, it's all good.  According to the packet's size guide I'm a size 16.  It was absolutely swimming on me.  Size 14 was too large so I sewed up a 12 and the size was perfect.  The 4th muslin was necessary to adjust fitting to my shape.  Bad armhole fitting due to me being tired of muslin fitting.

The boucle was rough-cut first to accommodate future shrinkage then fused with Textureweft right up to the cutting line.  It will add bulk in the seam allowance but worth it to prevent unraveling.   The silk lining is rough cut also.  


Then they were loosely basted together to hold steady for quilting.  Quite loose in case the quilting stitches draw the silk in, causing shrinking. 


Now the quilting process.  See that puckering?  I will not iron that flat like the last jacket because I now see it as being pretty and it brings a kind of plushness to its feel.


And the final cut after quilting:


Saturday 25 November 2017

French Style Jacket Number Two

I found some boucle that was a good colour, but its accent threads were a little drab.  So I bought some "donor" fabric that contained nicer accent threads.  After stripping them from the brown fabric and weaving them into the green fabric, it's exactly what I wanted.
+

=

Now that the thread swapping is finished, I bought Vogue pattern V7975 and cut the muslin from an old sheet.


Trim added and finished dress.